Hey, boo. Wacch ya doing? Today we’re going to do the oil service required light reset on my Hyundai Veloster. You may be like, oh great, another boring content, but there are people out there who don’t know how to do it and want to know it.
We’re going to do it step by step and if you know if you’re advanced, just skip through some of the parts. So today will be a little more in-depth, and it will be an oil reset. So let’s get to it.
Contents
Warning! Please note your vehicle model. This tutorial will hold true for the first and second generations of the Hyundai Veloster (2014 2015 2016 2017 2018 2019 2020 2021 2022 model years).
Time needed: 3 minutes
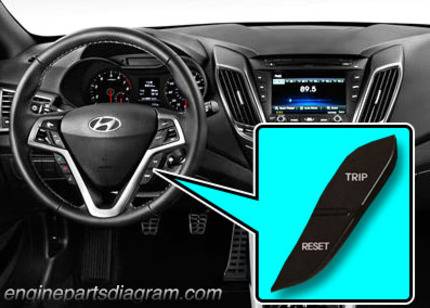
Just like the previous generation, you can reset the service light via the cluster display on this new Veloster but with a different button. So here’s how you reset it:
If your vehicle has the keyless starting system, press the START/STOP button twice without pressing the brake pedal
Then, use the ❏ button to cycle through the dash screen by pressing the button here that reveals pages. Then we pressed the button again and again till we saw the USER SETTINGS or gear in the upper right corner of the screen
In order to proceed, press the down button until you reach SERVICE INTERVAL and click OK
In the next step, I’ll drag this down to the RESET button and press OK
I was prompted to confirm the reset, so I clicked OK when it asked me to do so
You may also go to ADJUST INTERVAL if you want to change the service interval and adjust the range to whatever you like
So that’s all there. If you find that this post helped you, contact us with any comments or questions, and we’ll be sure to get back to you as soon as we can. Thanks for reading, and good luck!
When it comes to safety on the roads, nothing beats the sterling integration of technology…
Imagine a car engine as the heart of a business. Without proper and regular maintenance,…
Maintaining the health of your car is much like maintaining your health. Ignoring minor symptoms…
The quest to find the perfect engine variant, when in the market for a used…
When it comes to advancing your automotive acumen, understanding the ins and outs of purchasing…
Jeep Wranglers, known for their robust character and off-road prowess, can prove to be resilient…
This website uses cookies.
View Comments
I have a 2013 Hyundai Veloster...I need instructions in how to reset the oil indicator!